As of today, I have completed the first two code examples from Beginning Game Programming by Michael Morrison. So far, this project has started off fun and even slightly challenging. I am really enjoying it. Here are some of the things I have learned.
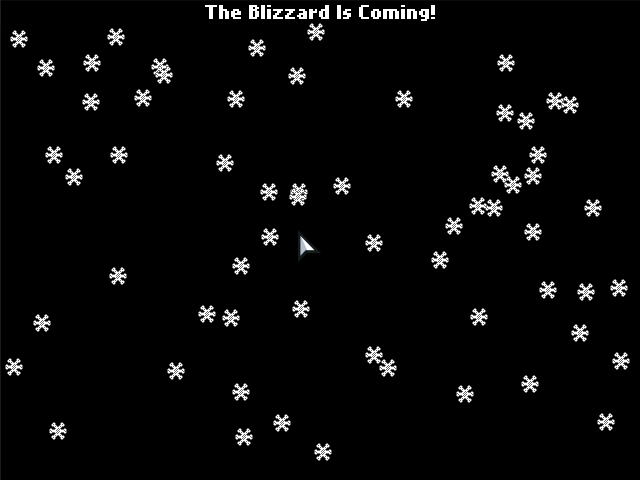
Chapter 2: Blizzard Example
This chapter was not too challenging. In the book, this chapter had the reader create a basic game engine in C++. Since we are working with HaxeFlixel, I didn’t need to worry about that. But you do need to know how HaxeFlixel structures its projects. In a barebones HaxeFlixel project you have an assets folder (where all the game’s sprites, sounds etc live), a source folder (where all your source code goes), and a project xml file. The source file starts off with the AssetPaths, Main, and PlayState Haxe files.
The AssetPaths file is a class that scans the assets directory and creates pointer objects that you can use for your games. The Main file Loads in your game and sends the player to the PlayState. The PlayState file is where the core of your game is going to run from. In this file you have the create function, which is where you do all your initialization for your game, and the update function which is where all your game’s core logic will execute from.
In the Blizzard example, I also created a SnowFlake class file which is a basic class file that extends the HaxeFlixel FlxSprite class. The “game” doesn’t have a lot happening other than a timer and counter that controls how many and when to add snowflakes to the game screen.
You can see the Blizzard example in action over at itch.io.
Chapter 3: Crop Circles Example
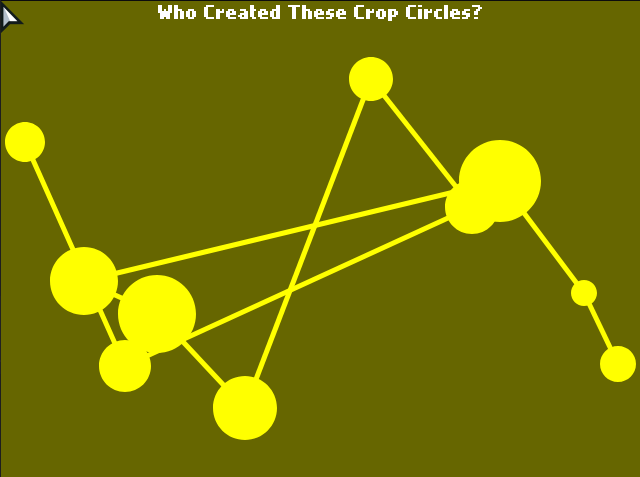
This next chapter goes a little deeper into creating a game engine. The core of this chapter is about creating basic shapes, circles, squares, lines etc. This was the first real challenge so far. I had never drawn basic shapes using HaxeFlixel before. Luckily for me, and you, the creators of HaxeFlixel had us covered.
I was able to find and use the FlxSpriteUtil class which has all the functions we need to create these basic shapes. This class itself provided a bit of a challenge too. The function drawLine uses a typedef to manage the shape of the line. I had not used typedefs before and needed to learn a bit more about how to use them properly. Type defs are basically a json style grouping of variables that you define and then pass to whatever function needs them. The following is the typedef for LineStyle in HaxeFlixel:
typedef LineStyle =
{
	?thickness:Float,
	?color:FlxColor,
	?pixelHinting:Bool,
	?scaleMode:LineScaleMode,
	?capsStyle:CapsStyle,
	?jointStyle:JointStyle,
	?miterLimit:Float
}
This is how I defined what I needed to draw the lines:
var lineStyle:LineStyle = {color: FlxColor.YELLOW, thickness: 5};The next big challenge was drawing the lines from one circle to the next. To do this, I had to keep track of the two most recently drawn circles. Then I needed to find their centers. Next I had to determine the size and position of the graphic that would hold the line drawing. Finally, determine where within that graphic the circles lie. For this, I used a number of built in Haxe and HaxeFlixel functionality.
private function drawCropLine(circle1:FlxPoint, circle2:FlxPoint):Void
	{
		// Create a line style, similar to CSS border styling
		var lineStyle:LineStyle = {color: FlxColor.YELLOW, thickness: 5};

		// These four lines figure out the extremes so we can figure out the positioning and size of the following sprite
		var minx:Int = FlxMath.minInt(Std.int(circle1.x), Std.int(circle2.x));
		var maxx:Int = FlxMath.maxInt(Std.int(circle1.x), Std.int(circle2.x));
		var miny:Int = FlxMath.minInt(Std.int(circle1.y), Std.int(circle2.y));
		var maxy:Int = FlxMath.maxInt(Std.int(circle1.y), Std.int(circle2.y));

		// Create a new sprite instance for the line
		line = new FlxSprite(minx, miny);
		// Create a transparent graphic to act as a canvas.
		line.makeGraphic(maxx - minx, maxy - miny, FlxColor.TRANSPARENT, true);
		if ((circle1.x < circle2.x && circle1.y < circle2.y) || circle1.x > circle2.x && circle1.y > circle2.y)
		{
			// One of the circles is in the top left corner. Draw line from top left to bottom right
			FlxSpriteUtil.drawLine(line, 0, 0, maxx - minx, maxy - miny, lineStyle);
		}
		else
		{
			// Otherwise, draw the line from the bottom left to top right.
			FlxSpriteUtil.drawLine(line, 0, maxy - miny, maxx - minx, 0, lineStyle);
		}
		// Add the line to the game state
		add(line);
	}
To find the position and size of the graphic, I used several classes. First the centers of the circles were assigned to FlixPoint classes. This is a basic class that tracks a point in X/Y coordinates. Then I determined which points were at the extremes of their axis for the purpose. Using that, I was able to draw a transparent graphic on the state with the centers of the two circles in opposite corners. Finally, I determined which corners the circles were in and drew the line between them.
Like the Blizzard example in Chapter 2, I draw a random number of these circles and then end. You can see the Crop Circles example at itch.io.
Final Notes
I had one other challenge that I had that wasn’t technically related to the examples I wrote. In the Crop Circles example, I was having trouble getting the lines to draw at all. For some reason the circles were being drawn, but the lines weren’t. I spent several hours trying to reconfigure the line code but to no avail. Then it dawned on me. In my update function, I had a check on the number of circles being drawn. I only drew lines from the second circle on. So on the first pass through, I drew a circle, but every pass since, I was supposed to drawing a circle and line between it and the previous one. But that second set of code never triggered. Why? Because I never incremented the number of circles. So the check to see if the number of circles was greater than zero never triggered. Once I started incrementing the number, the lines started drawing. Fun.
You can keep up with the code as I progress through Beginning Game Programming over at Github.